Table of Contents
- AWS Connector
- AWS setup guide
- CloudBilling Configuration Guide
AWS Connector
The AWS Connector can be used to retrieve usage data from AWS Bucket storage, as well as maintain the product portfolio and accompanying pricing rules. The connector uses AWS’s Cost and Usage report for usage information and the Price List API for product and pricing information.
The usage is retrieved daily and the connector can be used to create a mapping between the AWS account IDs and the customers you have configured in CloudBilling.
AWS setup guide
For CloudBilling, in order to retrieve all the required data from AWS Cloud on your customers and generate corresponding invoices, a bucket with cost and usage reporting is required. Access to this bucket and pricing information is enabled for CloudBilling via IAM Roles, where our application assumes a role you specifically configure for this. Mentioned below are the steps required to set up cost and usage reporting in AWS.
Step 1. Setting up the S3 Bucket to store the reports.
The first step required to provide the usage data is to set the bucket where the required usage reports will be dropped.
- Go to https://console.aws.amazon.com/s3 or navigate to S3 bucket storage as shown in the image below.

Figure AWS Connector 1: Navigation menu with S3 highlighted
- Click on ‘Create Bucket’.
- Follow the steps to setup a new S3 bucket. The settings for the bucket can be left as-is.
Step 2. Enabling the reports in AWS.
- Go to My Billing Dashboard (can be accessed through the dropdown option ‘My Billing Dashboard’ beside your profile username on the menu).
- Click on Cost & Usage Report on the navigation pane on the left.
- Click ‘Create report’ and follow the steps outlined below.
Step 1. On this page, you are required to give your report a name. Any name can be used for the report. All the other settings must be left untouched (see image below).
‘Include resource IDs’ must be unchecked. CloudBilling does not support Resource ID’s for billing purposes.

Figure AWS Connector 2: Creating Cost and Usage report step 1
Step 2.
- Give a report path prefix. Any prefix name can be used.
- Set report data time granularity to daily.
- Set Compression type to ‘ZIP’.

Figure AWS Connector 2: Creating Cost and Usage report step 2
Step 3.
- Review the settings of your report and press “Create”
Step 3. Creating a security policy for bucket access.
- Go to https://console.aws.amazon.com/iam (can be accessed through the dropdown option ‘My Security Credentials’ beside your profile username on the menu).
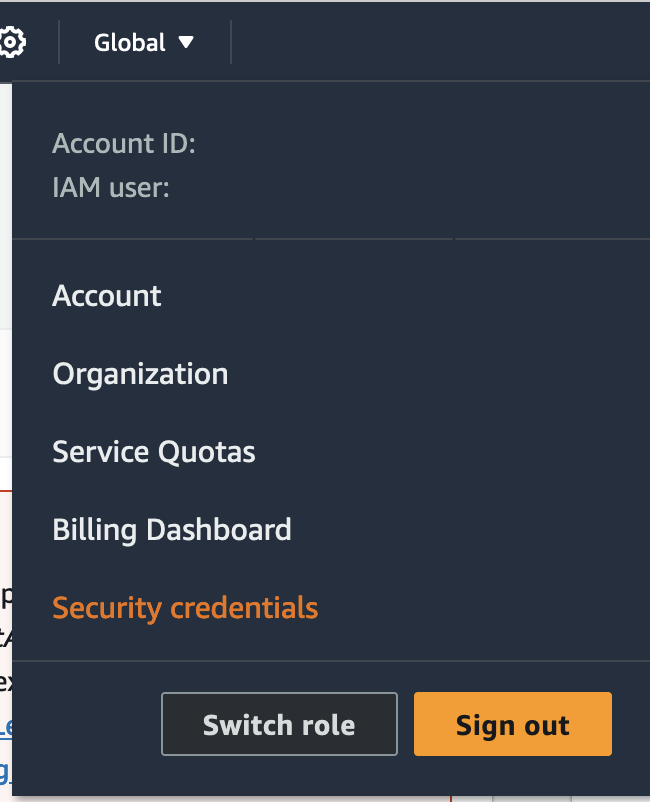
Figure AWS Connector 4: Security Credentials Navigation
- Click on ‘Policies’ on the left-hand side navigation pane.
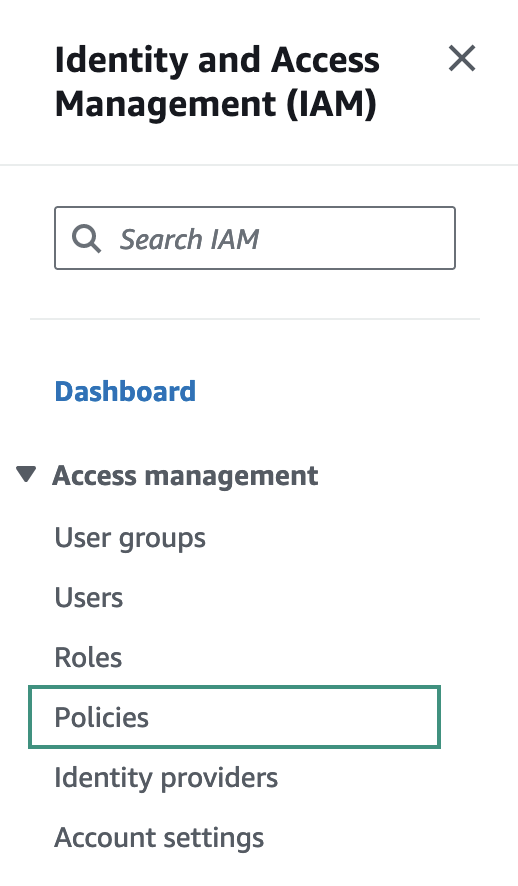
Figure AWS Connector 5: Navigating to Policies in security menu
- Click on ‘Create policy’
- Select the Service ‘S3’

Figure AWS Connector 6: Selecting the S3
- Under ‘Access level’, open the ‘list’ actions and select ‘ListBucket’
- Open the ‘read’ actions and select ‘GetObject’

Figure AWS Connector 7: Selecting the policy actions
- Under resources, you can add your bucket ARN. You can find your bucket ARN (Amazon Resource Name) when going to S3, choosing the bucket you want to restrict your policy for, and going to its properties. In case you want this policy to be applicable to all buckets, check ‘Any’ box.

Figure AWS Connector 8: Obtaining the bucket ARN
- For the objects, you can also specify where the report is located using Uniform Resource Identifier (URI). You can obtain URI by going to the same section as specified above and then choosing the folder or object that you need. In that directory, you can press the ‘Copy URI’ button. Otherwise, check ‘Any’ box in case you want this policy to access every object inside the bucket.

Figure AWS Connector 9: Obtaining the object URI
- Click ‘Next’
- Give your policy a name and description. You will use this policy to allow access later.
You can see these steps performed in a figure below:

Figure AWS Connector 10: Policy creation step-by-step guide

Figure AWS Connector 11: Selecting the pricing policy actions
-
Click ‘Next’
-
Give your policy a name and description. You will use this policy later to allow access.
Step 4. Enabling IAM roles with web identity
This authorization method allows CloudBilling application to assume a role on your AWS environment, specifically created for this purpose. As a result we use short-lived tokens, which by default expire in one hour.
Step 4a. Creating a security policy for pricing information.
-
Go to https://console.aws.amazon.com/iam
-
Click on ‘Policies’ on the left-hand side navigation pane.
-
Click on ‘Create policy’.
-
Select the Service ‘Price List’.
-
Under ‘Actions allowed’, open the ‘Read’ actions and select ‘DescribeServices’ and ‘GetProducts’.
In JSON editor, you can edit:
{
    "Version": "2012-10-17",
    "Statement": [
        {
            "Sid": "[sid]",
            "Effect": "Allow",
            "Action": [
                "pricing:DescribeServices",
                "pricing:GetProducts"
            ],
            "Resource": "*"
        }
    ]
}
- Click ‘Next’, give your policy a name and click ‘Create’.
Step 4b. Trusting our Azure IDP
-
Go to https://console.aws.amazon.com/iam
-
Click on ‘Identity providers’ on the left-hand side navigation pane.
-
Click on ‘Add provider’.
-
Select the Type ‘OpenID Connect’.
-
Enter provider URL ‘https://login.microsoftonline.com/86ad11ea-4a41-440d-8538-5e95d71f536c/v2.0’
-
Enter audience ‘aa1400f3-5b2c-4564-9895-1a9a2a0835ea’.
-
Click on ‘Add provider’.

Figure AWS Connector 19: Trusting our OpenID Connect provider
Step 4c. Defining a role that our application can assume
-
Go to https://console.aws.amazon.com/iam.
-
Click on ‘Roles’ on the left-hand side navigation pane.
-
Click on ‘Create role’.
-
Select ‘Web identity’ as trusted entity type, the idp and audience created at step 4b.

Figure AWS Connector 20: Defining a role
-
Click ‘Next’.
-
As permission policies, select the policies created at step 3 and step 4a.
-
Click ‘Next’, give it a suitable name and ‘Create role’.
Step 4d. Restricting access to your CloudBilling tenant
Edit the role that you created at the previous step.
-
Go to https://console.aws.amazon.com/iam.
-
Click on ‘Roles’ on the left-hand side navigation pane.
-
Find the role you created above by typing its name in the search box.

Figure AWS Connector 21: Finding a role
-
Click on the role to edit it.
-
Select the role and select tab ‘Trust relationships’

Figure AWS Connector 22: Edit trust relationship
-
Click on ‘Edit trust policy’ and add condition on sts:RoleSessionName equal to your CloudBilling tenant.
-
You can find CloudBilling tenant name by authorizing yourself in CloudBilling and going to the main page of CloudBilling environment where you want to set up AWS connector. Copy the tenant name from environment URL. In the example below, the tenant name is “CloudBilling_Demonstration”

Figure AWS Connector 23: Restrict role session name
- You can copy the line you have to add from the example following the figure below.

Figure AWS Connector 24: Restrict role session name
{
"Version": "2012-10-17",
"Statement": [
     {
        "Effect": "Allow",
        "Principal": {
            "Federated": "arn:aws:iam::079149000170:oidc-provider/login.microsoftonline.com/86ad11ea-4a41-440d-8538-5e95d71f536c/v2.0"
        },
        "Action": "sts:AssumeRoleWithWebIdentity",
        "Condition": {
            "StringEquals": {
               "login.microsoftonline.com/86ad11ea-4a41-440d-8538-5e95d71f536c/v2.0:aud": "aa1400f3-5b2c-4564-9895-1a9a2a0835ea"
            }
        }
     }
   ]
}
{
"Version": "2012-10-17",
"Statement": [
     {
        "Effect": "Allow",
        "Principal": {
            "Federated": "arn:aws:iam::079149000170:oidc-provider/login.microsoftonline.com/86ad11ea-4a41-440d-8538-5e95d71f536c/v2.0"
        },
        "Action": "sts:AssumeRoleWithWebIdentity",
        "Condition": {
            "StringEquals": {
               "sts:RoleSessionName":"[tenant]",
               "login.microsoftonline.com/86ad11ea-4a41-440d-8538-5e95d71f536c/v2.0:aud": "aa1400f3-5b2c-4564-9895-1a9a2a0835ea"
            }
        }
     }
   ]
}
- Click on ‘Update policy’ to save your changes.
Step 5 (Optional). Enabling Tags
AWS offers you the ability to tag individual resources. A tag is a label that you assign to an AWS resource. Each tag consists of a key and an optional value, both of which you define. Tags enable you to categorize your AWS resources in different ways, for example, by purpose, owner, or environment. This is useful when you have many resources of the same type—you can quickly identify a specific resource based on the tags you’ve assigned to it. For example, you could define a set of tags for your account’s Amazon EC2 instances that helps you track each instance’s owner and stack level. Once you have assigned the required tags, activate these tags by navigating to the Cost allocation tags section.

Figure AWS Connector 25: Navigating to cost allocation tags
CloudBilling configuration guide
Step 1. Configuring the accounts
To setup the CloudBilling AWS connector • In the menu bar go to Connectors • Under Amazon Web Services, click on ‘Connector Settings’ • Click ‘Add’

Figure AWS Connector 26: Navigating to AWS connector settings
Fill in the account details you configured in the previous steps:
When using IAM to authenticate your connector:
- Name: Give your account a name of your preference. Usually it corresponds to the name of your customer
- Role ARN: Use the Role ARN that you created in Step 4. The created role will be in the section Roles under Access Management. Click on it and its ARN will be present in the Summary section at the top.
- Bucket Name: Use the name of the bucket that you created
- Region: Select the region indicated near your bucket name. You can find it when accessing the S3 menu (search S3 in AWS console or us this link).
- Report Prefix: Use the report prefix you gave it in Step 2.
- Report Name: Use the name of the report you provided in Step 2.

Figure AWS Connector 27: Adding a new AWS account in CloudBilling
After filling up the information on your bucket, you can see a checkbox “Enable sharing of reservations”. This setting passes the discounts to CloudBilling users in case the reservations are shared in AWS (see examples below). It is recommended to match this setting with the settings you have in your account. You can access these settings by going to your account settings and selecting the ‘billing preferences’ tab: 
Figure AWS Connector 28: Reservation sharing settings
Here are some examples on how this setting might affect the billing of your customers:
- If reservation sharing is on in the AWS Console as well as in CloudBilling, the discounts from AWS are always passed on to the customers
- If reservation sharing is turned on in the AWS Console but not in CloudBilling, your customers are sharing reservations in the management console but not in CloudBilling. That means that in case a customer is using another customer’s reservation which has a discount, the discount is passed on to the reseller, but not to the customer. Only if the payer account is also a user account, the customer is eligible for the discount.
In the table below the input fields, you can see 13 product categories that are retrieved from AWS. These categories can be set up to work in different ways.

Figure AWS Connector 29: Mapping the products and customers
- Credit – Any credits that AWS applied to your bill. Be aware that AWS might update reports after they have been finalized if AWS applies a credit to your account for the month after finalizing your bill. That means that the credit may appear in Cost and Usage report during the next billing period.
- DiscountedUsage – The rate for any instances for which you had Reserved Instance (RI) benefits. If the account corresponding to the DiscountedUsage is the one who purchased the RI as well, it gets charged the LineItemUnblendedRate otherwise, the PublicOnDemandRate is used.
- Fee – Any upfront annual fee that you paid for subscriptions. For example, the upfront fee that you paid for an All Upfront RI or a Partial Upfront RI.
- Refund – Negative charges that AWS refunded money to you for. Check the Description column for details. AWS might update reports after they have been finalized if AWS applies a refund to your account for the month after finalizing your bill.
- RIFee – The monthly recurring fee for Reserved Instances subscriptions. For example, the recurring fee for Partial Upfront RIs and No Upfront RIs that you pay every month.
- Tax – Any taxes that AWS applied to your bill: for example, VAT or US sales tax.
- Usage – Any usage that is charged at On-Demand Instance rates.
- SavingsPlanUpfrontFee – Any upfront fee you paid for your Savings Plans. For example, the upfront fee that you paid for an All Upfront Savings Plan or a Partial Upfront Savings Plan. CloudBilling assigns the fee to whatever account it is reported on, so the using account.
- SavingsPlanRecurringFee – the monthly recurring fee for your Savings Plans-related subscriptions. For example, the recurring monthly fee for a Partial Upfront Savings Plan or No Upfront Savings Plan. CloudBilling assigns the fee to whatever account it is reported on, so the using account.
- SavingsPlanCoveredUsage – Any on-demand cost that is covered by your Savings Plan. Savings Plan covered usage line items are offset by the corresponding Savings Plan negation items. CloudBilling assigns the usage to whatever account it is reported on, so the using account.
- SavingsPlanNegation – When the Savings Plans discount is applied, this line item is present and contains negative costs (discounts). This enables you to find the net cost after Savings Plans discounts, using the total sum of the Unblended Cost. CloudBilling assigns the negation to the using account if and only if that account is also the account that purchased the SavingsPlan, otherwise it is assigned to the master account. This is determined using the SavingsPlanARN.
- BundledDiscount - The bundled discount applied to the line item. A bundled discount is a usage-based discount that provides free or discounted usage of a service or feature based on the usage of another service or feature.
- SPP Discount - Amazon partner discount. This discount is usually applied to the CSP as a partnership program promotion.
All of these product types can be mapped in different manners.
For Customer Mapping:
- As Reported – The purchase would map to the customer as reported in the billing report. That means that if you have a purchase, it will be assigned to the customer indicated in the report and not the master account of the bucket.
- Map to Master – Instead of mapping to the actual customer reported in the report, you can also map the LineItemType to the master account. Commonly used in the case of Tax and/or Credit, where the purchase normally shouldn’t show up on a customer’s invoice.
For Product Mapping
- As Reported – The purchase would map to the product as reported in the billing report. That means that if you have a purchase, for example, a credit for AWS Reserved instances linux x64 machine, you will have the negative value for that product on the invoice because of it.
- Use Type – These are used for LineItemTypes that do not have a corresponding SKU in the billing report. For example, if you set Credit purchases of the product from the example above to Use Type, they will be presented on the invoice as “Credit”, and not “AWS Reserved instances linux x64 machine”.

Figure AWS Connector 30: Do not forget the 'Enabled' checkbox
After you are finished, you can save your new account by clicking the save button.
Step 2. Enabling the AWS Products and Pricing Maintenance
After you have created your first AWS connector account in CloudBilling, go to ‘Connectors’ and under Amazon Web Services, press ‘Settings’.
- Check ‘Perform AWS Product and Pricing Maintenance’
- Select the product cluster, under which the new AWS products will be created
- Select the customer cluster, to which the new AWS pricing rules will be applicable
- Select the default markup. This will be the markup you apply to every customer. For example, the value of 15 will bill your customer extra 15% of the product cost. Markup can be also edited for a specific customer or a product. See section below on how it can be done
- Input the required billing output tags. These are usually put by our team and used for the invoices and exports.
- In the field for ‘Stop processing reports after day’, you can set up the number of days after which the report is not being retrieved anymore. For example, if you set number 9, on the 9th of October, the report for September will not be updated anymore.

Figure AWS Connector 31: Setting up the maintenance
Step 3. Mapping your customers
Within 24 hours CloudBilling will start retrieving the customers corresponding to your AWS account configuration. Once that happens, you need to map your AWS customers to CloudBilling customers.
- In the menu bar go to Connectors
- Click on ‘Customer Mapping’ under Amazon Web Services connector
- Make sure you have CloudBilling customer entities created. Use our documentation in case you have difficulties creating new customers.
- Map the AWS account IDs to CloudBilling customers and click on Approve one by one. Within 24 hours of successfully completing this step, you should see AWS usage information flow into your CloudBilling account in the form of purchases.

Figure AWS Connector 32: Mapping the CloudBilling and AWS customers
Step 4. Setting up the markups
There are multiple ways in which you can set the markups for your customers:
Setting up a markup for all the customers
In order to set up a global markup for AWS, go to ‘Connectors’ tab. Under the AWS, select ‘Settings’. On the right side, you can see the field ‘Default Markup’. In that field, you can write up the markup number. For example, 15 corresponds to a 15% markup for the AWS products.

Figure AWS Connector 33: Setting up a global AWS markup
Setting up a markup for the specific customers
Every customer has a section called ‘Amazon Web Services. Under that section, there is a field called ‘Markup’. If you set the value of that field to 20, 20% markup will be applied to that customer./br/ This field overwrites the default markup that you have set up in the connector settings (see above).

Figure AWS Connector 34: Setting up a customer-specific markup
Setting up a markup for the specific products and customers
In order to set up a markup for the specific products and to combine it with the specific customer, a new pricing rule must be set up which will override the default markup. You have to override the pricing rule because it is externally managed. Otherwise, if you edit the existing rule, the next connector run will create a new “duplicate” rule leading to double values on the invoice.
The best way to set up this markup is to go to the existing invoice of the customer, identify the markup rule that you need to replace and create a new pricing rule. When setting up a new pricing rule, go to the advanced tab and under ‘ Override Rule’ field, find the rule that needs to be replaced. See how it is done in a demonstration below:

Figure AWS Connector 35: Setting up a customer-specific markup